

How to adjust the handlebars on a children bicycle?
Hey there, fellow parents and bike enthusiasts! As a supplier of children's bicycles, I've seen firsthand how important it is to have a well-adjusted bike for your little ones. One of the key adjustments you can make is to the handlebars. In this blog post, I'll walk you through how to adjust the handlebars on a children's bicycle, so your kids can have a comfortable and safe riding experience.
Why Adjust the Handlebars?
Before we dive into the how-to, let's talk about why adjusting the handlebars is so important. First off, it's all about comfort. If the handlebars are too high or too low, your child might end up with an awkward riding position, which can lead to discomfort and even pain in their back, neck, or shoulders. A proper handlebar adjustment can also improve control. When your child can reach the handlebars easily and hold them in a natural position, they'll have better steering and braking control, which is crucial for their safety on the road.
Tools You'll Need
Adjusting the handlebars on a children's bicycle doesn't require a whole bunch of fancy tools. Here's what you'll need:
- A set of Allen wrenches: These are usually included with the bike when you buy it. You'll use them to loosen and tighten the bolts that hold the handlebars in place.
- A ruler or tape measure: This will help you make sure the handlebars are at the right height and angle.
Step 1: Measure Your Child
The first step in adjusting the handlebars is to measure your child. You want the handlebars to be at a height where your child can sit comfortably on the bike with their arms slightly bent when holding the handlebars. To measure, have your child sit on the bike seat with their feet flat on the ground. Then, measure the distance from the top of the seat to their wrists when their arms are in a natural, slightly bent position. This measurement will give you a good starting point for adjusting the handlebars.

Step 2: Loosen the Bolts
Once you've measured your child, it's time to loosen the bolts that hold the handlebars in place. Most children's bikes have a stem that connects the handlebars to the fork of the bike. There are usually one or two bolts on the stem that you'll need to loosen. Use your Allen wrench to turn the bolts counterclockwise until they're loose enough to move the handlebars.
Step 3: Adjust the Height
Now that the bolts are loose, you can adjust the height of the handlebars. If you measured your child correctly, you should have a good idea of where the handlebars should be. Lift or lower the handlebars until they're at the right height. You can use your ruler or tape measure to double-check the height. Make sure the handlebars are level and straight before you tighten the bolts.

Step 4: Adjust the Angle
In addition to adjusting the height, you might also need to adjust the angle of the handlebars. Your child should be able to hold the handlebars in a natural position without having to strain their wrists. To adjust the angle, gently rotate the handlebars forward or backward until they're comfortable for your child. Again, make sure the handlebars are level and straight before you tighten the bolts.
Step 5: Tighten the Bolts
Once you're happy with the height and angle of the handlebars, it's time to tighten the bolts. Use your Allen wrench to turn the bolts clockwise until they're snug. Make sure the handlebars are secure and don't move when you try to wiggle them.
Step 6: Test the Adjustment
After you've tightened the bolts, it's a good idea to test the adjustment. Have your child sit on the bike and hold the handlebars. Make sure they're comfortable and can reach the brakes and gears easily. If the handlebars still feel too high or too low, or if the angle isn't right, you can go back and make further adjustments.

Different Types of Children's Bicycles
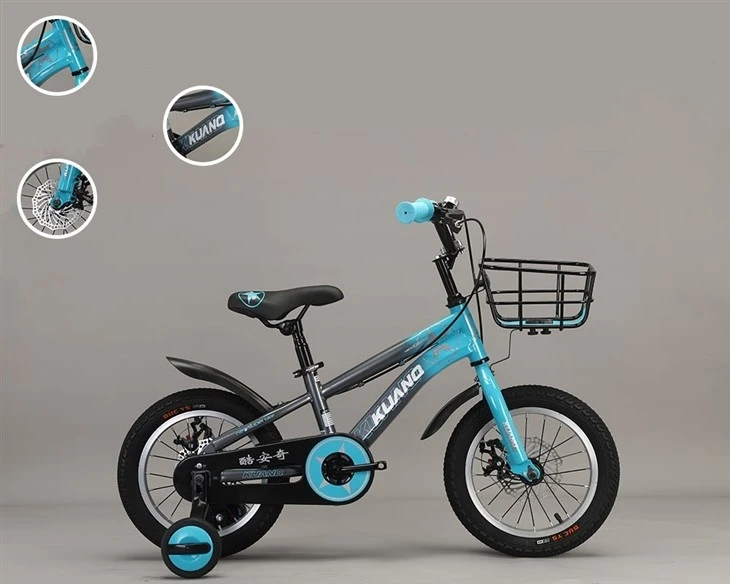
We offer a variety of children's bicycles, each with its own unique features and handlebar adjustment options. For example, our Youth Bike is designed for older kids and has adjustable handlebars that can be customized to fit their growing bodies. Our Kids Bike With Training Wheels is perfect for younger children who are just learning to ride. The handlebars on this bike are also adjustable, so you can make sure your child has a comfortable and safe riding experience. And if you have a little girl, our Children Bicycle Girl is a great option. It comes with a cute design and adjustable handlebars to fit her needs.
Tips for Maintaining Your Child's Bicycle
Adjusting the handlebars is just one part of maintaining your child's bicycle. Here are some other tips to keep in mind:
- Check the brakes regularly: Make sure the brakes are working properly and that the brake pads are in good condition.
- Keep the tires inflated: Check the tire pressure regularly and inflate the tires to the recommended level.
- Lubricate the chain: A well-lubricated chain will make the bike run smoothly and prevent wear and tear.
- Store the bike properly: When your child isn't using the bike, store it in a dry place to prevent rust and damage.
Conclusion
Adjusting the handlebars on a children's bicycle is a simple but important task that can make a big difference in your child's riding experience. By following these steps, you can make sure the handlebars are at the right height and angle for your child, which will improve their comfort and control on the bike. And if you're in the market for a new children's bicycle, be sure to check out our Youth Bike, Kids Bike With Training Wheels, and Children Bicycle Girl. We're here to help you find the perfect bike for your little one.
If you're interested in purchasing our children's bicycles or have any questions about handlebar adjustment or bike maintenance, feel free to reach out to us for a procurement discussion. We're always happy to help!
References
- "Bicycle Maintenance Basics" by The Bicycle Academy
- "How to Adjust Your Bike's Handlebars" by REI Co-op